 how-to
How to Grade Trading Cards Yourself: A Step-by-Step Guide
Table of Contents
- Why Grade Your Trading Cards at Home
- What You'll Need: Trading Card Grading Tools
- How to Check Trading Card Condition: A Safe Inspection Workflow
- Card Centering Guide: Measuring Front-to-Back and Left-to-Right
- Evaluating Corners, Edges, and Surface Condition
- Understanding the Trading Card Grading Scale
- Self-Grading vs. Professional Grading: When to DIY and When to Submit
- Common Mistakes to Avoid When Grading Cards
- Frequently Asked Questions
Last Updated: October 20, 2026
Why Grade Your Trading Cards at Home
Grading your own trading cards is the first step toward understanding their true condition and market value. When you grade trading cards yourself, you're learning to spot the details that separate a $10 card from a $100 card.
The main reason collectors grade at home is simple: professional grading costs money. Submission fees range depending on the grading company and turnaround time.
Beyond cost, home grading teaches you what to look for. You start noticing centering issues, corner wear, and surface scratches that you'd otherwise miss. This knowledge makes you a smarter buyer when shopping at Dave's House of Cards.
What You'll Need: Trading Card Grading Tools
Essential inspection equipment
You don't need expensive equipment to grade trading cards yourself.
A desk lamp with LED bulbs works well for lighting. Position it to shine across the card at an angle, not directly down.
Cotton gloves protect the card from skin oils and fingerprints. Latex gloves work too, but they're thicker and make handling harder.
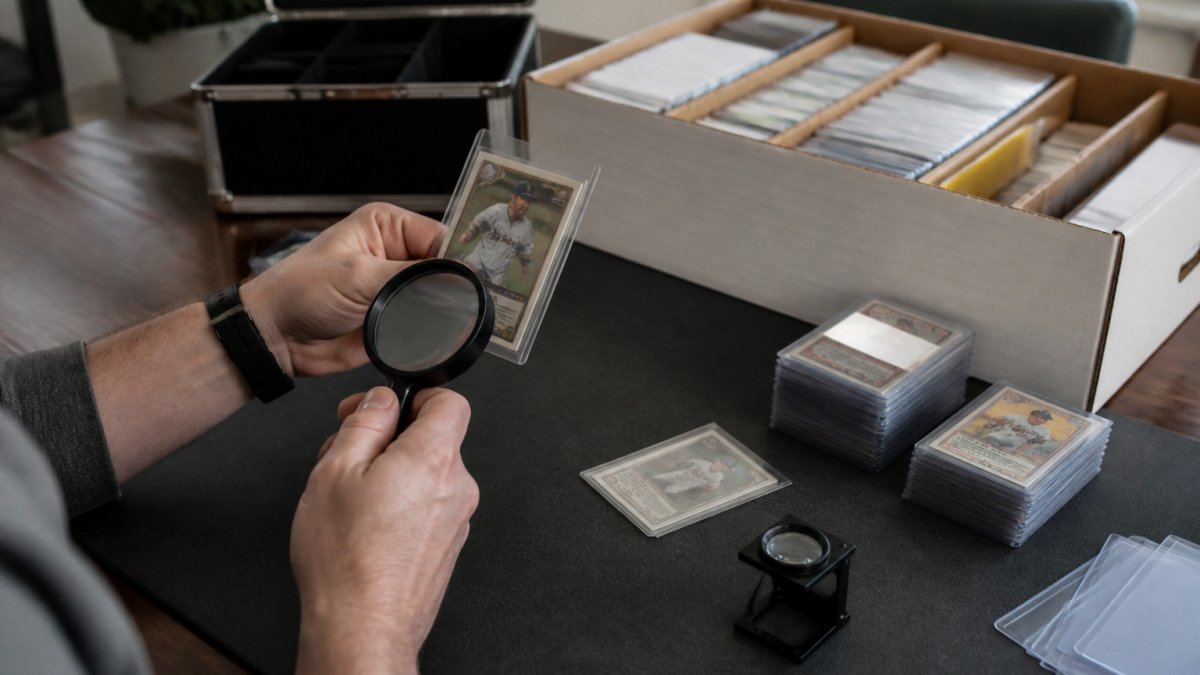
A basic magnifying glass (5x to 10x magnification) is enough to inspect corners and edges. You don't need a high-end magnifier yet.
Keep a clean, soft surface ready. Use a mousepad, soft cloth, or card grading mat.
Optional tools for detailed assessment
Once you've graded a few cards, consider adding tools that make assessment easier. A centering guide or ruler helps measure how centered the image is on the card.
A magnifying lamp combines light and magnification in one tool. These range from budget models around $30 to professional versions over $100.
Some collectors use a light box under the card to check for print defects and surface scratches. This isn't essential, but it does help with surface assessment.
A grading checklist or worksheet keeps your assessment organized. Write down centering, corners, edges, and surface condition as you check each one.
How to Check Trading Card Condition: A Safe Inspection Workflow
Prepare your workspace and protect the card
Before you touch the card, prepare your space. Clear your work area of anything that could scratch or stain the card. Remove pens, keys, and other objects. Wash your hands or put on cotton gloves.
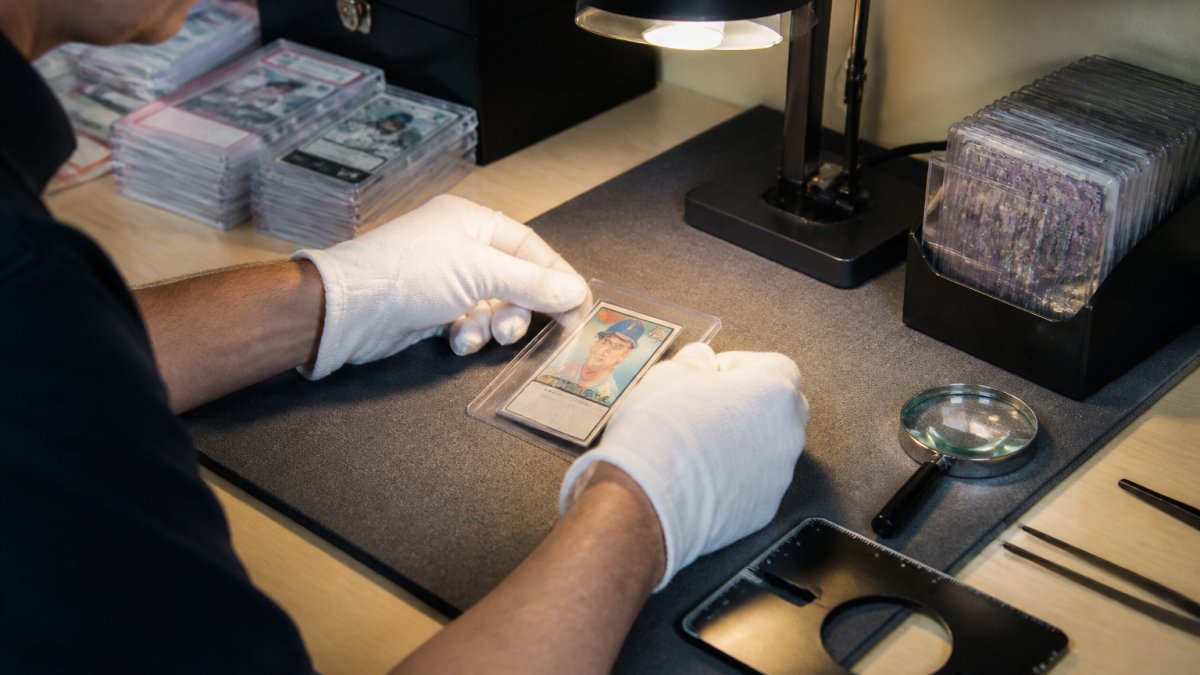
Place your soft surface (mousepad or mat) in front of you. This is where the card will rest during inspection.
Remove the card from its current holder carefully. If it's in a sleeve, slide it out gently. If it's in a rigid holder, open the holder without forcing it. Forced removal can damage the card or the holder.
Handle the card correctly during inspection
Hold the card by its edges only. Never touch the front or back surface. Even with gloves, oils can transfer to the card.
Use both hands when moving the card. Support it from underneath with one hand while steadying it with the other. This prevents accidental bending or creasing.
Rotate the card slowly under your light source. Tilt it at different angles to catch light on the surface.
When examining corners, use your magnifying glass but keep the card flat on your workspace. Don't lift it up to look at corners, this increases the risk of dropping it.
Card Centering Guide: Measuring Front-to-Back and Left-to-Right
Assessing horizontal and vertical centering
Card centering is how evenly the image sits within the borders. Poor centering is one of the most common condition issues.
Look at the borders around the image. Compare the left border to the right border. Are they the same width?
Do the same for top and bottom borders. Compare the space above the image to the space below. Uneven spacing means front-to-back centering problems.
Perfect centering means all four borders are equal width. Most cards have some centering variation, that's normal. The question is how much variation.
Minor centering issues (slight differences in border width) don't drop the grade much.
How centering affects overall grade
Centering is one of four main factors when you grade trading cards yourself. The others are corners, edges, and surface. A card with perfect centering but poor corners will still grade lower than its centering alone would suggest.
Think of centering as one piece of the overall picture. A card with slightly off centering but flawless corners and surface might still grade 9 (mint). The same card with off centering plus corner wear might grade 7 or 8.
Professional graders weight centering heavily because it's visible to anyone looking at the card. A centered card looks better on display or in a collection.
Evaluating Corners, Edges, and Surface Condition
Corner wear and whitening
Corners take the most damage during handling and storage. Look at all four corners under magnification. Check for wear, whitening, or creasing.
Whitening happens when the card stock gets compressed or damaged. The white inner layer shows through the colored outer layer. Even light whitening is visible under magnification.
Light corner wear is normal on older cards. The key is how much wear.
Run your eye along each corner edge. Feel for roughness without touching the card surface. Rough edges indicate wear. Smooth edges suggest the card hasn't been handled much.
Edge damage and print quality issues
Edges often show damage from shuffling (for game cards) or storage. Look at all four edges under magnification. Check for chipping, peeling, or print defects.
Print quality issues include misalignment, ink spots, or color variations. These are factory defects, not damage from handling. Factory defects lower the grade but are different from wear damage.
Light edge wear is common. Heavy chipping or peeling is less common and lowers the grade significantly. A card with light edge wear might grade 8. The same card with heavy edge chipping might grade 6 or 7.
Surface scratches, creases, and stains
Surface condition is the hardest to assess at home because scratches are sometimes hard to see. Tilt the card under your light at different angles.
Light surface scratches are almost invisible straight-on but show clearly under angled light. Heavy scratches are obvious. A card with light scratches might grade 8.
Creases are permanent damage. Even a light crease that's hard to see will drop the grade significantly.
Stains or discoloration lower the grade. Common stains include water damage, dirt, or storage marks. Light stains might drop a card one or two grades. Heavy stains drop it further.
Understanding the Trading Card Grading Scale
Grade definitions from 1 to 10
Trading card grading uses a 1-10 scale.
10 (Gem Mint): Flawless or near-flawless.
9 (Mint): Excellent condition. Centering might be slightly off.
8 (Near Mint-Mint): Very good condition. Minor centering issues acceptable.
7 (Near Mint): Good condition. Noticeable centering issues.
6 (Excellent-Mint): Solid condition. Clear centering issues. Visible corner wear.
5 (Excellent): Average condition. Obvious centering problems. Moderate corner wear.
4 (Very Good-Excellent): Below average. Heavy centering issues. Heavy corner wear.
3 (Very Good): Poor condition. Severe centering issues.
2 (Good): Very poor condition. Major damage throughout. Heavy creasing or staining.
1 (Poor): Extremely poor condition. Severe damage making the card barely collectible.
Half-grades and grader disagreement
Professional graders sometimes assign half-grades like 8.5 or 7.5. This accounts for cards that fall between two full grades. When you grade trading cards yourself, stick to full grades at first. Half-grades require more experience.
Graders occasionally disagree on a card's grade. One grader might see a card as 8, another as 8.5 or 9. This happens because grading involves judgment calls, especially on borderline cards.
The difference between grades is small. A 7 and an 8 might look similar at first glance, but under careful inspection, the 8 has noticeably better condition.
Self-Grading vs. Professional Grading: When to DIY and When to Submit
Limitations of at-home grading
Home grading is useful for personal collection management and understanding card condition. It has limits, though.
Professional graders have decades of experience and standardized criteria. They grade thousands of cards. They catch details that home graders miss. Their grade is recognized in the market.
Home grades are estimates. They're accurate for your own purposes but not for resale value. A card you grade as 8 might grade 7 or 9 from a professional.
Lighting, magnification quality, and experience all affect accuracy. Better equipment and more practice improve your home grades, but they'll never match professional consistency.
When professional grading adds value
Professional grading makes sense for high-value cards. If a card is worth $100 or more, professional grading is worth the submission fee.
Rare cards and vintage cards benefit from professional grading. These cards command higher prices, and buyers want the assurance of a professional grade.
Cards you plan to sell should be professionally graded if they're valuable. Buyers trust professional grades more than seller descriptions.
For personal collections of common or lower-value cards, home grading is fine.
Dave's House of Cards helps collectors find the exact cards they need for their sets.
Common Mistakes to Avoid When Grading Cards
Grading under poor lighting: Dull light hides surface scratches and centering issues. Use bright, angled light. This is non-negotiable.
Touching the card surface: Even with gloves, touching the front or back risks transfer of oils or damage.
Ignoring centering: New graders often overlook centering because it's subtle. Spend time learning this factor. It matters.
Comparing to only one card: Grade several cards to calibrate your eye.
Grading when tired or rushed: Grading takes focus. Do it when you're alert. Tired grading leads to mistakes.
Forgetting that grades are estimates: Your home grade is an educated guess, not a final verdict.
Frequently Asked Questions
How do you grade a trading card yourself?
Start by preparing a clean, well-lit workspace and handling the card with clean hands or cotton gloves. Inspect the card's centering, corners, edges, and surface under bright lighting or a magnifying lamp. Compare what you see to the grading scale (1-10), looking for wear, whitening, scratches, creases, and print quality issues. Document your findings on a grading worksheet. Remember that your at-home assessment is an estimate, professional graders may assign a different grade based on their expertise and standardized criteria.
What tools do you need to grade a trading card?
Essential trading card grading tools include bright lighting or a magnifying lamp, a magnifier (10x magnification recommended), cotton gloves to protect the card, a grading scale reference sheet, and a semi-rigid holder for safe storage during inspection. Optional tools include a centering tool or ruler to measure border width, a grading checklist to track condition factors systematically, and a smartphone or camera to document surface damage. Many collectors create a free printable grading worksheet to standardize their assessments across multiple cards.
Can you accurately predict a professional card grade at home?
Your self-grading can give you a reasonable estimate, but professional graders often assign different grades due to their trained eye and standardized criteria. Factors like lighting conditions, magnification quality, and subjective judgment on borderline grades (like 7.5 vs. 8) introduce confidence ranges. Professional grading is most valuable for high-value cards where a half-grade difference affects resale value significantly. For lower-value cards or personal collection inventory, at-home grading provides useful condition documentation without the submission fees.
What should you look for when grading a trading card?
Evaluate centering (front-to-back and left-to-right border alignment), corners (whitening and wear), edges (print quality and chipping), and surface condition (scratches, creases, stains, indentations, and factory defects). Check for authentic card stock and print quality, as counterfeits often show poor centering or color inconsistencies. Use a magnifier to spot fine scratches or surface wear that affect the grade. Document each factor separately, then combine them to assign an overall grade on the 1-10 scale.
Grading trading cards yourself builds knowledge that makes you a better collector and buyer. Start with the basics: lighting, magnification, and the four condition factors. Practice on cards you already own. Compare your grades to professional grades when you can. Over time, your assessments will improve. Whether you're shopping at Dave's House of Cards or managing your personal collection, understanding how to evaluate card condition puts you in control of your collecting decisions.